


Building Online Store With Shopify
6 Steps To Building An Online Store Using Shopify
- Choose a plan if you have not yet – Start a 14-day free trial by clicking here
- Set up your Shopify store settings
- Choose a template for your online store
- Customize your e-commerce template
- Add Your Product(s)
- Do a test order and celebrate yourself!
Choosing a plan that best fits you
Shopify currently offers 3 plans:
- Basic Shopify ( $29 /month )
- Shopify ( $79 /month )
- Advanced Shopify ( $299 /month
- Shopify Plus ( $2000 /m )
Choosing the right plan depends primarily on the scale of the business you are planning on building.
If you are planning on building a single product store to sell only to English speaking customers we recommend you go with the Shopify Basic Plan, if you are looking to build a mid-size multi-lingual business we recommend going with the Regular Shopify Plan, and if you are planning on building a big or enterprise business we would recommend the Advanced Shopify plan or the Shopify Plus Plan.
You can read more about Shopify by visiting their website here.
Setup your Shopify settings
Before you get into the design aspect of your online store, it is a good idea to set up the critical store settings. Below you can find a list of the settings you want to set up before proceeding to customize your store.
You can find these settings on the left panel of your Shopify admin dashboard, panel item should be called “Setting”, and it should look like the image below.

- Store Language: You can find your store’s language settings by clicking on “Store Language”.
- Store Currency: You can find your store’s currency settings by clicking on “General ” -> “Store Currency”.
- Store Timezone: You can find your stores timezone settings by clicking on “General” -> “Standards and Formats”.
- Store Address: You can find your stores address settings by clicking on “General” -> “Store Address”
- Store Location: You can set up your store location settings by clicking on “Location” -> “Locations”
- Store Name: You can find your store’s name settings by clicking on “General” -> “Store Details”.
- Business Contact Details: You can find your stores business contact details settings by clicking on “General” -> “Store Address”
- Store Order settings: You can find your store’s order settings on “Taxes” -> “Tax Region & Tax Calculations”.
- Store Payment Settings: Choose where you want to get paid and what payment methods you allow for example – Shopify Payments ( stripe ), PayPal, Amazon Pay, Apple Pay, Google Pay, Bitcoin & more by going here: “Payments” -> “Payment Providers”.
- Store Policy’s: You can find them by going to your store settings then clicking on “Legal”.
Choose A Template For Your Online Store
Now that you have all the settings set up for your Shopify store, next we will go ahead and choose a template that fits your online store’s branding.
Shopify has a library of both free and paid store templates to choose from, choosing the right one is really up to you and your decision should be based on the complexity of the online store you are planning on building.
Also, you should make sure that the layout, design & typography, and color mix fits the branding for your online store.
Steps To Add A Theme To Your Shopify Store:
- Go to your Shopify admin and click on “Online Store” -> “Themes”.
- Scroll down to the “Theme Library” and click on one of the buttons:
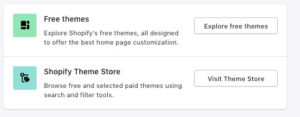
- Browse the theme you want and click the “Add Theme” button. This will add the selected theme to your “Theme Library”.
- Go back to “Online Store” -> “Themes” scroll down to “Theme Library” and you should see the theme of choice at the top of the theme library list. Should look like this:

Go ahead and click on “Actions” and click on “Publish”. - Now the theme of your choice should be the active theme.
You can browse Shopify store templates by visiting the Shopify theme store by clicking here.
Customize Your e-Commerce Template
Now that you have successfully added a theme to your Shopify store, let’s go ahead and teach you how to customize it.
To customize your theme of choice follows the simple steps below:
- Go to your Shopify admin and click “Online Store” -> “Themes”.
- Click the “customize” button in the live theme section and the Shopify interactive builder will open up.
Now that you are on the interactive online store editor in Shopify, it’s important to familiarise yourself as much as possible with your themes configuration.
Every Shopify theme has different elements of configuration, so go ahead and take the next few minutes to make changes and familiarise yourself with your theme of choice.
When you are satisfied with the copy and visual changes you have made, you can save your current changes by clicking the save button to the top right of your screen.
Note: All themes do have one section in common and you can find this section called “Theme Settings” at the bottom left of the interactive editor.
Add Products To Your Online Store
Now that you have everything set up in your online store, let’s go ahead and add some or a product to your online store. To add a product to your online store follow the simple detailed steps:
- Go to your Shopify admin and click on “Products” -> “All Products”.
- Click the Add Product button in the top right of your screen.
After you’ve done this, you now must now fill out some product detail fields, which we listed below to make your life easier:
Product Fields:
- Product Title (Name)
- Product Description (About)
- Product Photography (Media)
- Pricing Information (Current / Sale Price )
- Inventory Information: SKU ( Stock Keeping Unit ) ( Only If You Have One ) / Bar Code / Quantity
- Shipping information ( Shipping From & Other )
- Variants ( If you have them for your select product )
- Search Engine Listing Preview: How you want the title and description of your product to show up on a search engine such as Google.
After filling out these fields, you can go ahead and go ahead and click the dropdown to the top right under “Product Status” and choose the “Active” choice, and click “Save”.
Now your product should be live, after updating anything on your product page just click “Save” again to publish your recent updates.
Do A Test Order & Celebrate Yourself!
Congratulations! Your store should now be all set up and ready to make you consistent residual income.
Place a test order, and if everything goes well you are done!